How to Professionally Set & Sew Pointback Mounted Rhinestones
This morning, I saw numerous images of the newly crowned Miss Universe 2023, R’Bonney Gabriel, wearing a beautiful, black and blue beaded gown by Filipino designer Rian Fernandez. This show stopping dress featured many different shaped rhinestones including some that were set in metal settings. Ironically, in my last blog post, I mentioned that I would be discussing how to mount rhinestones and why you may want to consider using this method in your next sewing project that requires rhinestone embellishment. This method is standard when working on designer gowns, stage costumes, and couture styled clothing but isn’t often used by home sewists. The process is relatively simple. Set a stone in a metal mounting and sew it to a garment or accessory. If you follow my helpful tips, you too can get a professional finish without spending a small fortune.
Before continuing to the tutorial here are a few common asked questions.
Why should I consider using mounted rhinestones?
A: Mounted rhinestones often elevate the look of a gown or costume, especially when fancy shapes are mixed. You can use just a few mounted rhinestones as the focal point of your embellishment to create a dynamic design.
Do I have to use a mounting?
A: If you can glue a stone on your design without destroying the fabric or ruining the professional finish, no. Finer fabrics, like silk, should never be glued, making hand sewing mounted stones a must.
Are mountings expensive?
A: Prices vary depending on the size, shape, and metal finish of a mounting. I’ve bought mountings for under $.50 each to a few dollars/each. Larger stones require larger mountings which are typically more expensive. Also, if you buy an unusual or specialty cut stone, expect to pay a higher price for the mounting.
Are mounted rhinestones the same as sewn on rhinestones?
A: No, they are not. Sew on rhinestones have holes in the upper and lower portion of the stone which allows a sewist to sew them on a garment. Thread passes thru the holes securing it to the garment.

Tools and Materials Needed for Mounting Rhinestones
You will need a few tools and supplies before starting.
Jeweler’s or Craft Pliers
A good pair of jeweler’s or craft pliers that have smooth surfaces. My favorite pliers for rhinestone setting are Baby Wubber’s Bent Nose Jewelry Pliers that are perfect when working with small mountings. If possible, avoid using craft pliers that have a textured surface as this may damage your stone/mounting. You want to keep the mounting finish as smooth as possible to avoid snagging or damaging your fabric.

Point Back Rhinestone and Rhinestone Mounting in Correct Size
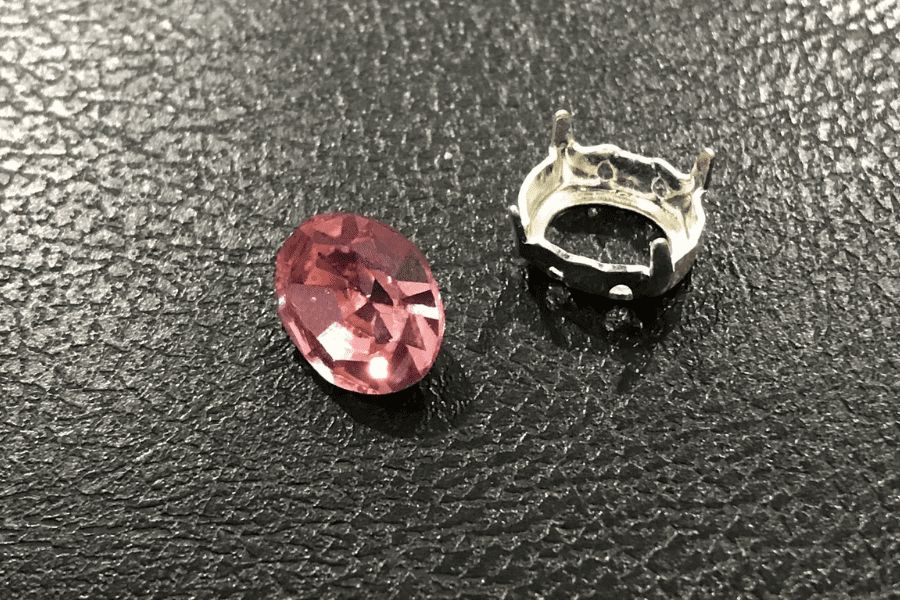
Almost all point back rhinestones are sold by size and in most cases, the size is metric and has a specific article/style number. For example, the oval shaped stone used in my sample photo is an 8 x 10mm, article #4100. These numbers are important when selecting the correct mounting. If your mounting is too small, the stone won’t fit. If the mounting is too large, the stone will ‘sink’ in the mounting, and you won’t be able to secure it. Also, some vintage stones don’t fit in newer mountings due to older manufacturing processes, so it is advantageous to ensure they fit before purchasing your mountings. Claw or prong mountings are sold in different shapes and styles but when you are selecting a mounting for sewing, make sure it has holes in the lower portion of the mounting. See sample in photo below. This allows you to sew the mounting rather than gluing it. When working with fine fabrics, like silk, it is best to avoid gluing stones.
Monofilament Thread
When sewing on mountings, you will need a good quality monofilament thread. It’s important to select one that can secure the stone mounting and withstand wear and tear. Don’t use cotton threads for this step. Cotton thread can fail over time. I use Mettler Transfil for attaching my mountings. It is strong and pliable. It is also available in 2 colors-clear and smoke ensuring that I have a good color match to my fabric.
Sewing/Beading Needles
You will need to select a sharp hand sewing needle that passes thru the holes on the mounting and your fabric. Some jewelry beading needles are dull, so it is best to try different sewing needles before starting. To do this, hold the mounting and pass a needle thru the holes. The eye of your needle should be very small since this is the part that will get stuck in your mounting holes.

TIP: It is best to have a rough idea of your embellishing design before purchasing rhinestones and mountings as they can be more expensive than sew-on and glue on stones.
Once you have assembled all the necessary supplies, it’s time to start setting rhinestones!
How to Mount a Rhinestone
Step 1: Place rhinestone in mounting
Begin by setting your mounting on a flat surface. Place the rhinestone in mounting RIGHT SIDE UP.

Step 2: Level stone in mounting
Like fine jewelry, we want to make sure the stone is set as level as possible. Use your pliers to adjust the position of the stone in the mounting. Once you are satisfied with the stone’s position, CAREFULLY pick it up and hold the stone in place by placing your index finger (pointer finger) on top of the stone and your thumb on the bottom of the mounting.
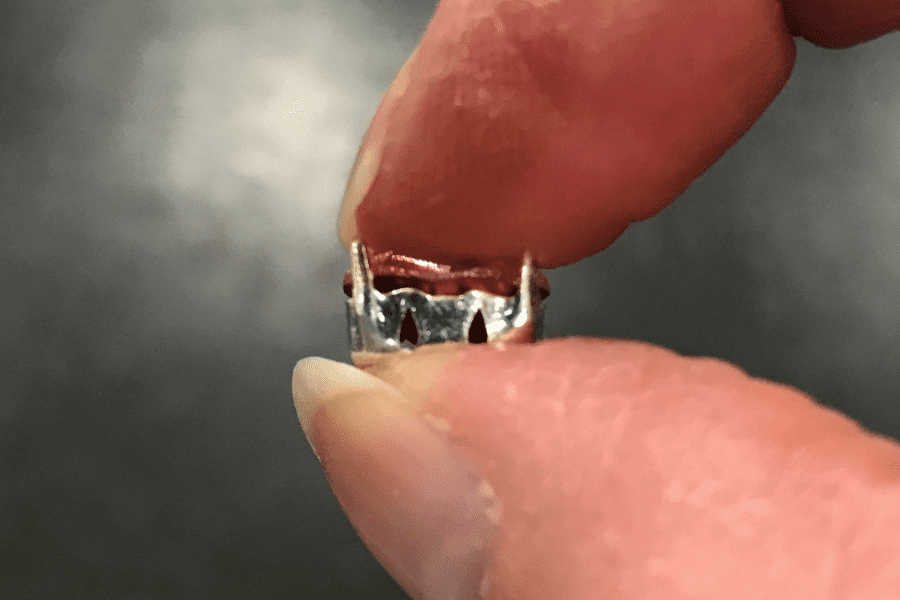
Step 3: Pick up your pliers. Place one plier tip against the tip of a prong and the other plier tip under the mounting. Gently and slowly squeeze the prong against the rhinestone. DO NOT over tighten!! The stone should be slightly loose during this first pressing. Repeat this process on the remaining 3 prongs. Remember that it is best to make several small adjustments to ensure that you can adjust your stone (if necessary) in the mounting as it may move during this tightening process. Continue slowly tightening the prongs until the rhinestone does not move when touched with your fingernail or pliers. That’s it! Your stone is mounted!

REMEMBER: rhinestones are made from glass and will break if pressed too hard.

Once the stone is set, you can sew it to your garment or accessory with the monofilament thread.
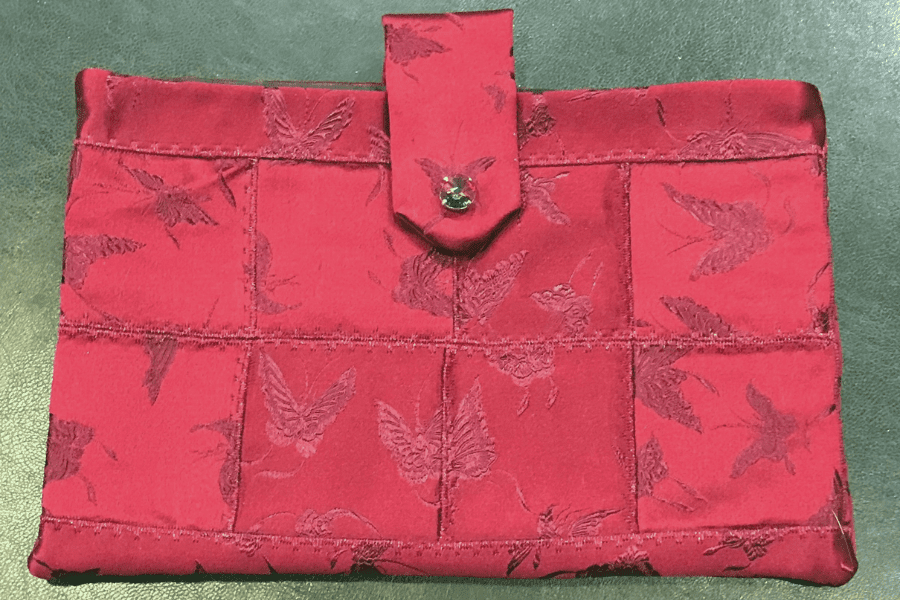
Sewing Mounted Rhinestones to Garment
Begin by arranging your mounted stones on your garment. If you are only sewing a few, it’s easy to position them. If you are sewing several, take a photo so you have a visual reference when sewing them on.
Begin by sewing the center stones first and working outward. Sew each mounting individually. DO NOT attach several at one time. Once you have the mounted rhinestones attached, you can fill in around them with beads, sequins, soutache, braiding, decorative trims, etc.
If this Sewing Tutorial has helped you, please consider sharing it with others on social media. Also, be sure to sign up for The Creative Sewist email list so we can send you helpful sewing advice.
If you have any questions or comments, please leave them below.
Please note: This article does contain affiliate links.
We are a participant in the Amazon Services LLC Associates Program and affiliate advertising programs designed to provide a means for us to earn fees by linking to Amazon.com and its affiliated sites.
CHRISTINE WARREN
Sewing isn’t just my job, it’s my passion. I’ve enjoyed sewing and needle working since I was very young.












This was one of the most interesting articles I have read of mounted stones on fabric, I’m so inspired to start a purse project that needed a redo, Thank you for sharing your article to help inspire others–!!