Sewing Tutorial: How To Easily Create An Amazing Patch Piecework
One of the easiest and most popular styles of quilted clothing is the “crazy patch block” style. A sewist begins with a focal fabric on a muslin or flannel block and attaches random pieces of fabric to it without any apparent pattern or arrangement. In this sewing tutorial, You will learn how to easily create an amazing crazy patch piecework. While the individual blocks may appear odd or disjointed, they somehow seem to work when arranged and sewn together as one. But, if you ever considered making “one” big block without making several tiny blocks and weren’t sure how to begin, then you will want to read on!
Supplies Needed:
- Muslin or diaper flannel (read below to decide on your needs)
- 1 spool of utility sewing thread, preferably a neutral color
- Assortment of fabric pieces that blend together
- Iron on stabilizer (optional)
- Decorative thread (optional)
Tools Needed:
- Sewing machine with straight stitch and decorative stitches
- ¼” sewing foot
- seam ripper
- Iron
- Ironing board
- Dressmaker’s Shears and snippers
Decide if you want a “puffy” or “flat” final look
Traditionally, crazy patch piecework is built on a diaper flannel foundation since the flannel shrinks slightly once washed to give the piecework a “quilted” look. Conversely, piecework built on a muslin base has a ‘flatter’ appearance and doesn’t shrink as much as the flannel.
If you aren’t sure which way to go, ask yourself the following:
- Am I making a coat with this piecework?
- Do I want the “puffy” look?
- Will I use this garment in the summer or winter?
If you need a little extra warmth or want the puffy look, consider using the diaper flannel foundation. For summer garments, opt for muslin.
Once you’ve decided on your foundation fabric, it’s time to start sewing!
Step 1: Measuring and cutting the foundation fabric
It’s very important to know how wide and long your foundation fabric needs to be so that you have enough piecework to cover your pattern piece. If using muslin, press it before cutting. If using diaper flannel, steam out any wrinkles. Measure your garment pattern piece (i.e., vest front) and cut a piece of foundation fabric that is 2 inches longer and wider. While it is tempting to cut an exact size, it’s important to understand that some stitches and fabrics will appear to pucker, and this may impact the final size of your piecework. It’s best to have a little extra piecework in case you make a mistake. (Think of this as your insurance policy against running ‘short’).
Step 2: Cutting the focal fabric piece
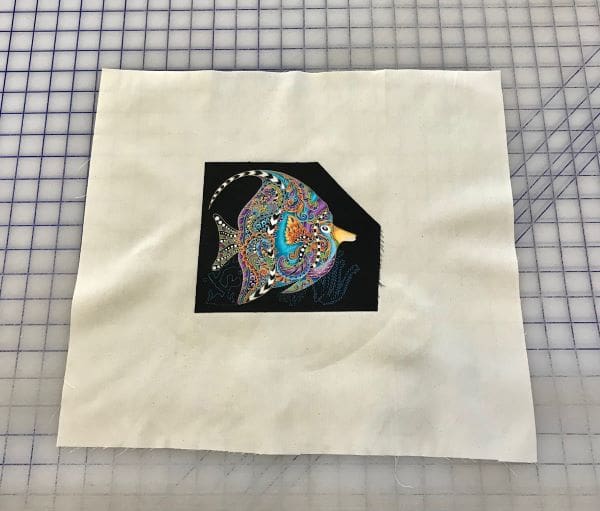
Select your focal fabric and cut out a 5-sided block. Apply a layer of Steam a Seam Lite 2 to the wrong side of it and position it on your foundation. Once you are happy with the positioning, press this fabric to the muslin or flannel. NOTE: This is the only block we will be fusing to the foundation.
Be sure that your focal piece has 5 sides and is centered on the foundation fabric. NEVER start a crazy patch with an even sided block! You won’t get the random pattern result that an odd-sided block creates.
Step 3: Applying fabric pieces
Layer 1
Select an assortment of fabric strips and pieces that complement your focal fabric—the order of application is entirely up to you. To begin the piecework, select a piece of fabric, press it, and cut a straight edge that lines up with one of the sides of your focal block. It’s important that you work with straight edges during the sewing phase.
Position rights sides together and sew a ¼” seam. (See photo) We will use a ¼” seam allowance for all the piecework.
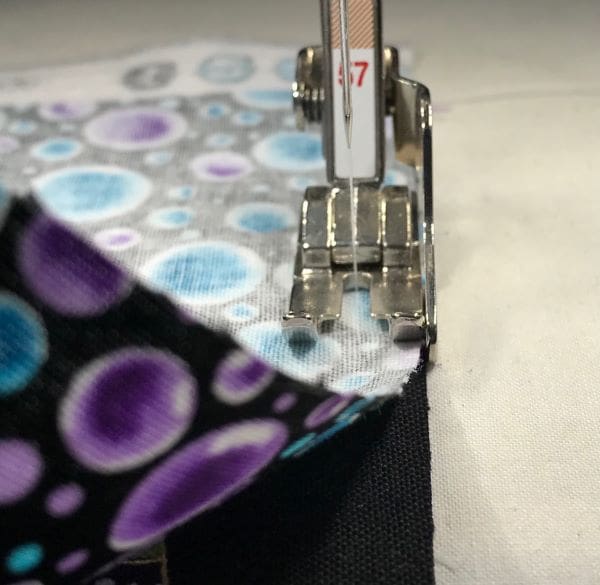
Once the seam is sewn, flip the piece open and press the seam outward (away from the focal block)
Next, select another piece of fabric, press it, cut a straight edge, and line it up with an adjoining side of your focal block.
You will build out the first layer by applying strips of fabric in either a clockwise or counterclockwise direction. It’s important to be consistent. Do not change directions.
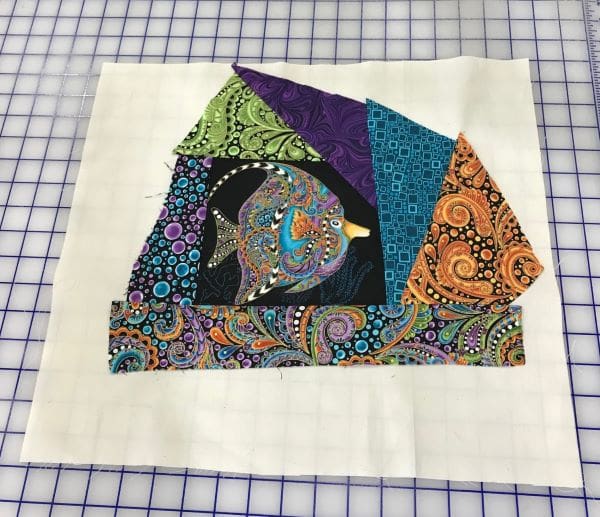
Repeat this process until you have applied a piece of fabric to each side of the focal block. Don’t worry if it doesn’t look great. You can adjust the size and shape of these pieces when you add Layer 2 pieces.
Layer 2
Layer 2 application process is the same as Layer 1, except in this layer, you may need to ‘remove’ fabric that is underneath the new layer. (We’ll cover this shortly.)
Select a starting point and begin by selecting a piece of fabric that coordinates with the adjacent piece from layer 1. Cut a straight edge and sew it to the layer 1 piece. Try your best to sew a straight line and be sure to cover the fabric from layer 1. Once you have the layer 2 piece sewn in place, determine if it covers any fabric from layer 1. If so, you will need to remove the extra fabric. To do so, remove the necessary stitching with a seam ripper and cut out the unnecessary fabric. Keep the pieces handy until you are finished with all piecework.
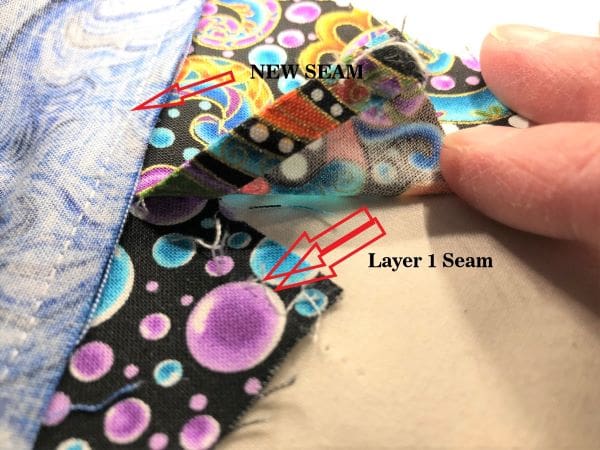
Carefully cut out the unnecessary fabric. Do not cut your foundation fabric or piecework!
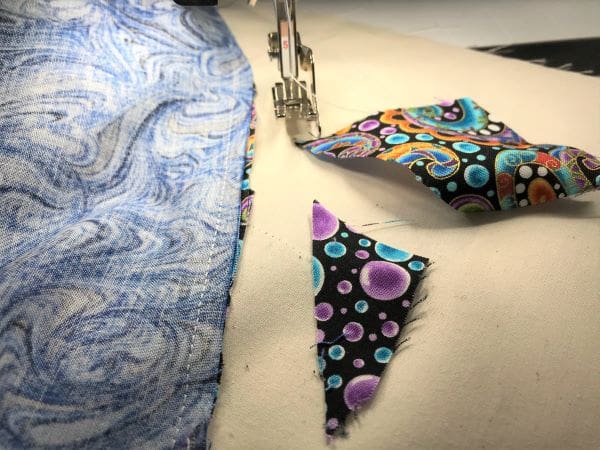
Once you have finished trimming, press the new seam away from the piecework toward the edges of your foundation fabric.
Continue building out your piecework on this layer until you reach the starting point. Be sure to trim any unnecessary fabric or stitches underneath each piece in layer 2.
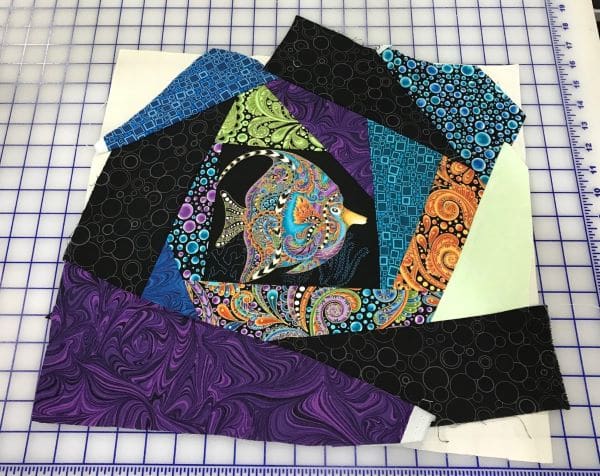
Layer 3 and Additional Layers
Layer 3 is constructed in the same fashion as layer 2. Repeat Layer 2’s process for each additional layer until all parts of the foundation fabric are covered. Note that some pieces will be larger than others.
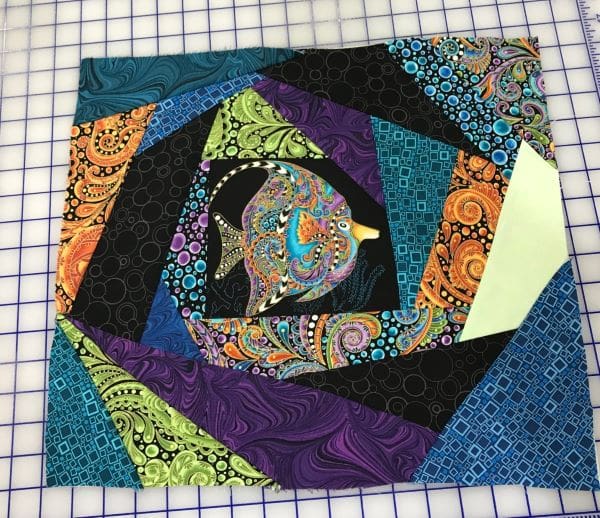
Once all the pieces are attached sew a ¼” seam around the edge of the piecework. This holds the last layer in place until all stitchwork is completed.
If you want to add decorative stitching or embroidery to your piecework, apply a single layer of Sulky Totally Stable Iron on stabilizer to the WRONG side of the foundation fabric.
Once the stabilizer is applied, you can use a decorative thread and embellish the piecework along the seams with a decorative stitch. This step is OPTIONAL but really adds dimension and detail to your piecework.
After all decorative stitching is finished, remove the stabilizer. Now cut out your pattern pieces and proceed with the assembly of your garment according to the pattern’s instructions.
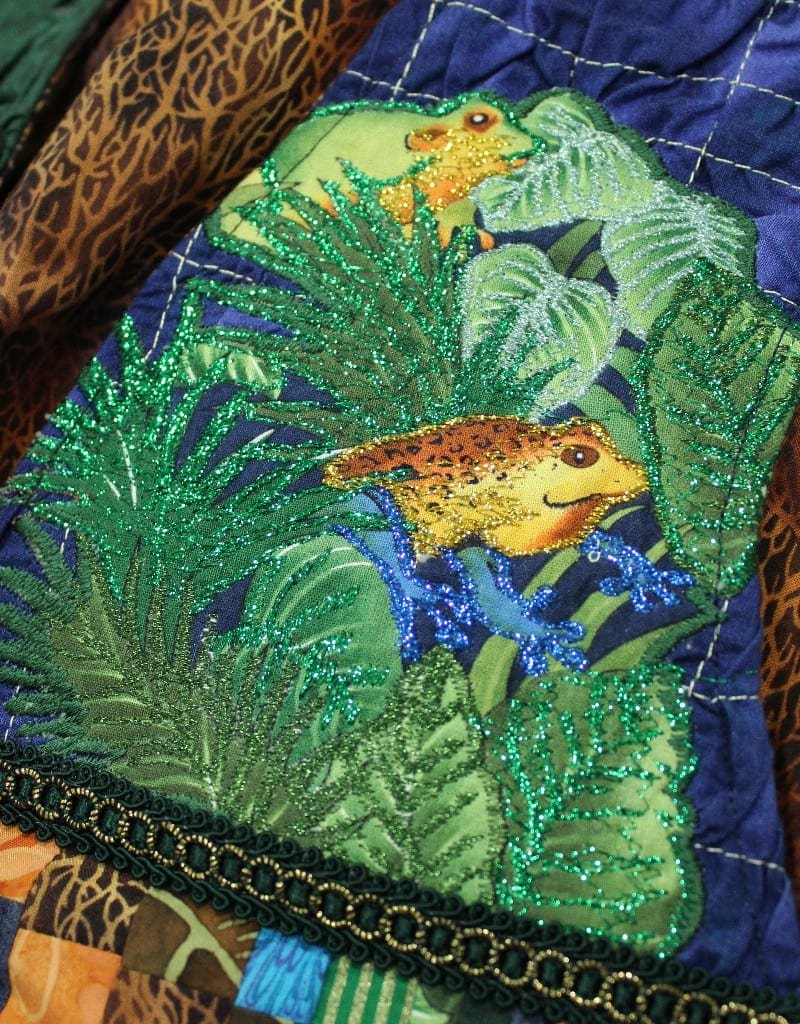
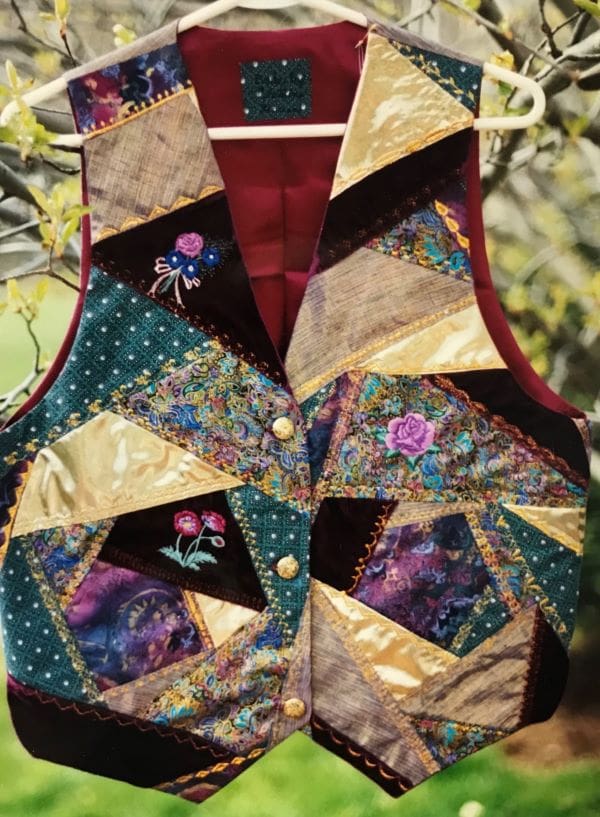
Crazy patch piecework is a fun and practical way to use a lot of small fabric pieces to create beautiful works of art. Below are a few photos of vests that I created using this technique.
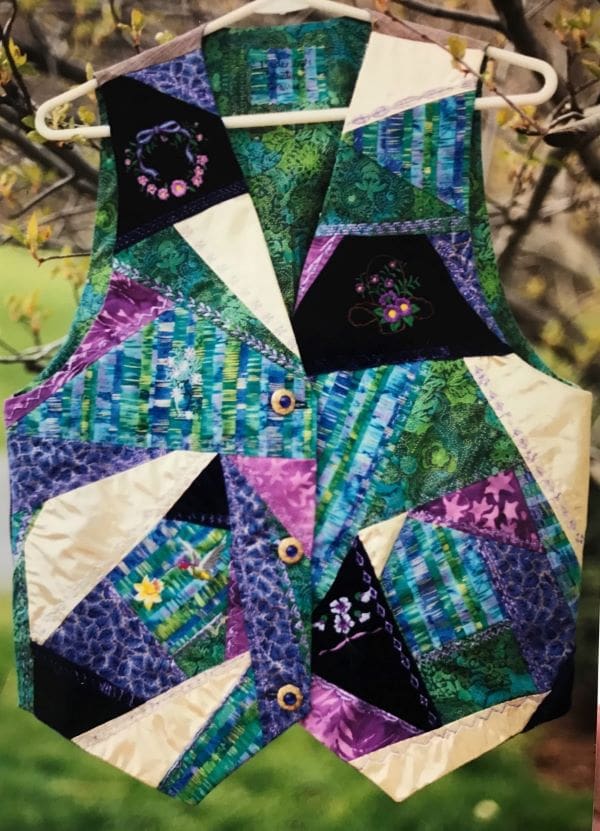
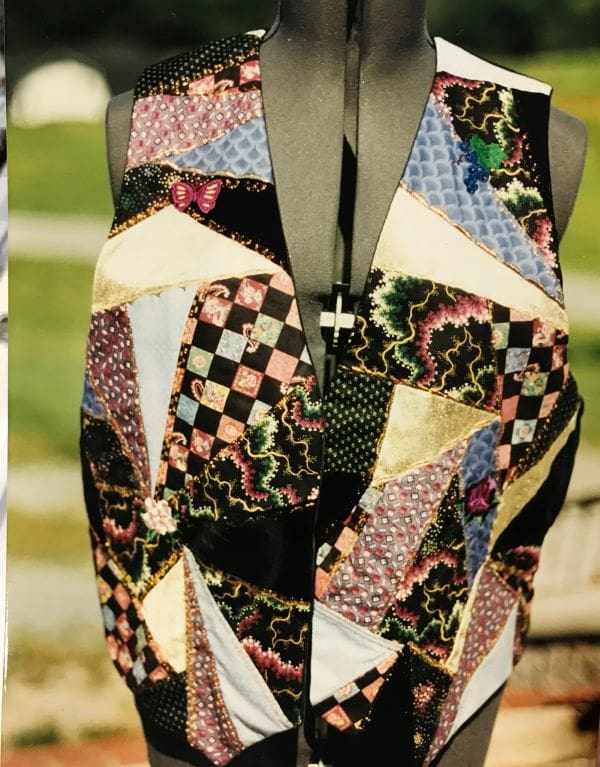
I hope you enjoyed this sewing tutorial and found the advice helpful. If you have any questions, please leave questions in comments section below and I’ll do my best to answer.
Before you go, please consider signing up for the email/newsletter list. We don’t send junk—just good sewing information.
CHRISTINE WARREN
Sewing isn’t just my job, it’s my passion. I’ve enjoyed sewing and needle working since I was very young.


