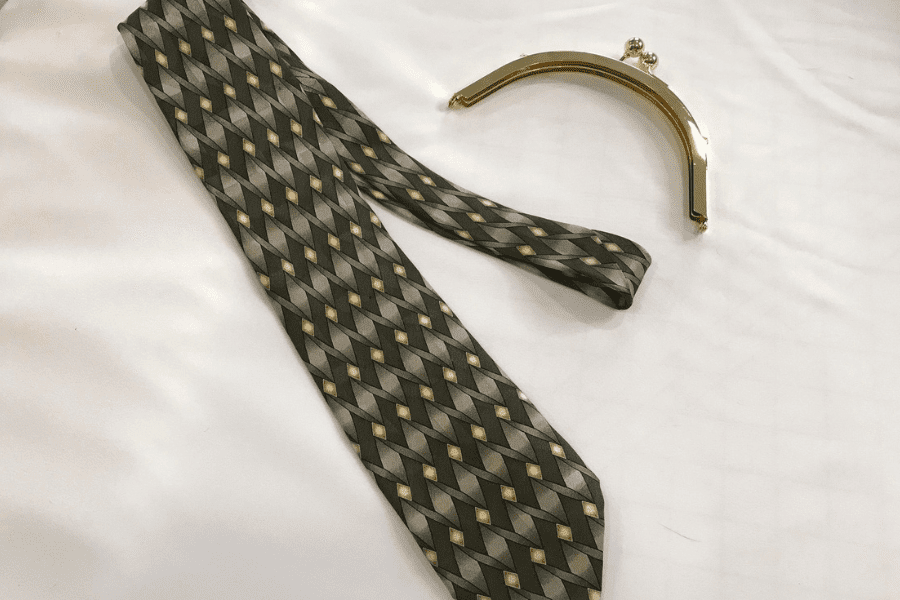
How to Create an Amazing Purse With One Necktie & Leftover Fabric
As we move to a more casual work environment, the demand for traditional business attire has declined leading to a surplus of men’s neckties. Sadly, many of these beautiful ties are tossed into landfills and sewists often look for creative sewing projects to upcycle the fabric.
If you need an Amazing Purse for a special occasion, consider making your own with a silk necktie and leftover fabric! The process is simple and can produce amazing results.
Before starting, gather a few necessary supplies:
- A necktie with a small or random print (Stripes and directional prints can be tricky to match and may require additional ties to match patterns)
- ½ yard of lining or silk lining fabric
- 1 pkg of Stabili-Tee or EZ-Tee Stabilizer by HeatnBond®
- Sallie Tomato’s
6” purse frame, Item # STS210S
47” Strap chain, Item #STS141S (Optional) - 1 small spool of general sewing thread
- Cotton batting (enough to quilt your purse)
- Decorative thread (I used a small spool of gold tone metallic thread on my bag)
- Glue for hardware
- 1 yard of decorative trim
- 1 pkg. of double fold bias tape (optional)

Step 1: Preparing Your Fabrics
Before you dismantle your tie, have it dry cleaned and/or spot treat any stains. Determine if there are any stains or tears that may impact your overall design. If your tie is in poor condition, you may want to consider using a different tie or strategically placing an applique to disguise the flaw.
Next, carefully remove ALL thread and stitching from tie. Do not pull or stretch the tie! Set aside the tags, lining materials, and batting. We will not be using these items. You will notice that ties are sewn in pieces. Go ahead and remove the seam stitching and separate the pieces.

Once you have all the stitching removed, carefully press your tie pieces FROM THE WRONG SIDE with an iron set on a “silk” heat setting. It is best to use as little steam as possible. If possible, set your iron to “No Steam.”
Apply 1 layer of EZ-Tee to the WRONG side of each tie piece. Follow manufacturer’s instructions.
Step 2: Quilting Your Pieces
Press your lining fabric. Remove all folds and creases. Lay it face down on your worktable.
Place one layer of your cotton batting on the WRONG side of the lining fabric. Smooth the batting with your hands to remove any bunching or folds. Next, with the wrong side facing the batting, arrange your tie pieces on top of the batting. Try to follow the straight of grain as much as possible.

Pin through all three layers of each tie piece. Once you have them pinned, cut them out. Leave enough of a margin around each piece so you can trim them down after quilting.
Use a straight stitch and quilt each tie piece. You can either follow a quilting template pattern or follow the design on your tie fabric like I did. (I used gold metallic thread) The idea is to secure all the layers together, so this stitching does not need to be complicated.

Sometimes the simplest sewing creates the most dynamic results.
Once all tie pieces are quilted, it’s time to assemble the purse.
Step 3: Start To Assemble Your Amazing Purse
If you haven’t already done so, lay a piece of copy paper under your purse hardware and trace the hardware curve. Measure the depth of the groove in your hardware and add that amount to your curve (mine was ¼” deep).
Next, add 5/8” to each side of your line. This will be your side seam.
Determine how long your purse needs to be. Measure down from the side seam mark and place a small line. Add 5/8” to this line for your seam allowance.
Draw your bottom line. For a softer finish, curve the edges.

Cut out your pattern piece and lay it on top of your largest tie section. Cut out 1 piece. This will be the back of the bag.
None of the other pieces will be large enough to cut 1 whole piece so you will need to “piece” it. You can either cut out blocks, strips, triangles, or any shape that would allow you to create a solid “panel” to cut out your purse front.

Once you have all the new panel “pieces” sewn together, sew a flat backed trim over each of the panel seams.

Place your pattern piece over the patchwork panel and cut it out. You need one panel.

For the most professional look, cut out a piece of liner fabric and sew it to the back of the patchwork. Use a 1/4″ seam allowance. This will cover the raw edges.
Next, with right sides together, lay the front piece over the back piece. Pin. Sew your side seams using a 5/8″ seam allowance.

OPTIONAL: You can use the double folded bias tape to finish the raw edges.
Once the side seams are sewn and graded, it’s time to “fit” the hardware on the bag. Begin by carefully placing it in the hardware channels. Does the curve fit, or do you need to grade it? Are the side seams not touching the frame hinges? If the seam interferes with the hinges, make the necessary changes now. Also, if you find that you do not have a snug fit in the channel, sew a row of the double folded bias tape along the curve.
Once everything lines up, add the glue to the hardware channels and insert the curved top of your purse. This step is easier if you do one side at a time.

Allow your purse to dry. It’s best to let it set for at least 24 hours before use.
And that’s it! Your Amazing Purse is finished!
Hopefully after reading this article, you will consider upcycling ties into a beautiful purse! This not only saves fabric from ending up in landfills, but it also enables you to enjoy a fun sewing project with material that you already own.
If you want to upcycle a tie worn by someone special and you don’t want to create a purse, consider Shirley Botsford’s book called “Daddy’s Ties.” It is an excellent resource on the subject and provides valuable information on the proper care and methods for collecting, laundering, and storing ties. She also provides several sewing projects made entirely of ties!
If this tutorial has helped you, please consider sharing it with others on social media. Also, be sure to sign up for The Creative Sewist email list so we can send you helpful sewing advice.
If you have any questions or comments, please leave them below.
Please note: This article does contain affiliate links.
We are a participant in the Amazon Services LLC Associates Program and Sallie Tomato, affiliate advertising programs designed to provide a means for us to earn fees by linking to Amazon.com and its affiliated sites as well as Sallietomato.com.
There is no additional cost to you when you make a purchase through any of my affiliate links. All items listed above were used in this tutorial.
CHRISTINE WARREN
Sewing isn’t just my job, it’s my passion. I’ve enjoyed sewing and needle working since I was very young.


