Top Three Sewing Techniques Every Sewist Needs to Know
Every sewist needs an arsenal of sewing tips, tricks, and techniques up their sleeve to tackle any sewing challenge that gets thrown their way. Today, I am sharing my top three must-know sewing techniques that helped me to improve my sewing skills and improve the appearance of my garments. They are:
- How to sew French seams
- How to use bias tape to finish a neckline (or armhole)
- How to grade between sizes on a sewing pattern
How to Sew French Seams
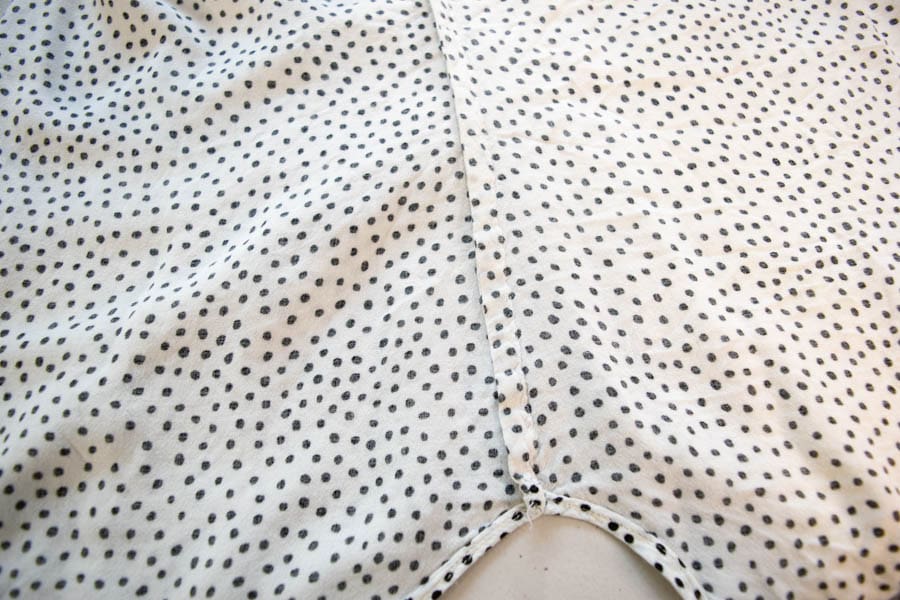
French seams are a beautiful seam finish that will have your sewing projects looking professional and gorgeously made inside and out. This seam finish is perfect if you do not have a serger but still want a durable way to finish your seams that looks nice on the inside.
What fabrics work best with French seams?
French seams work well with any light to medium weight fabric like silk. It is not the best finish for thicker fabrics, since heavy fabrics can cause your French seams to be bulky, difficult to sew, and hard to press flat.
French seams are one of the best possible finishes for very lightweight, silky fabrics, as well as sheer fabrics. When you use French seams on a sheer fabric, you won’t have to worry about unsightly fraying threads or stitching being visible from the right side of the fabric.
How to sew French seams
While French seams do take longer to sew and additional steps to your sewing process, they are surprisingly easy.
For this sewing tutorial, I will be showing you how to sew French seams using two scrap pieces of fabric.
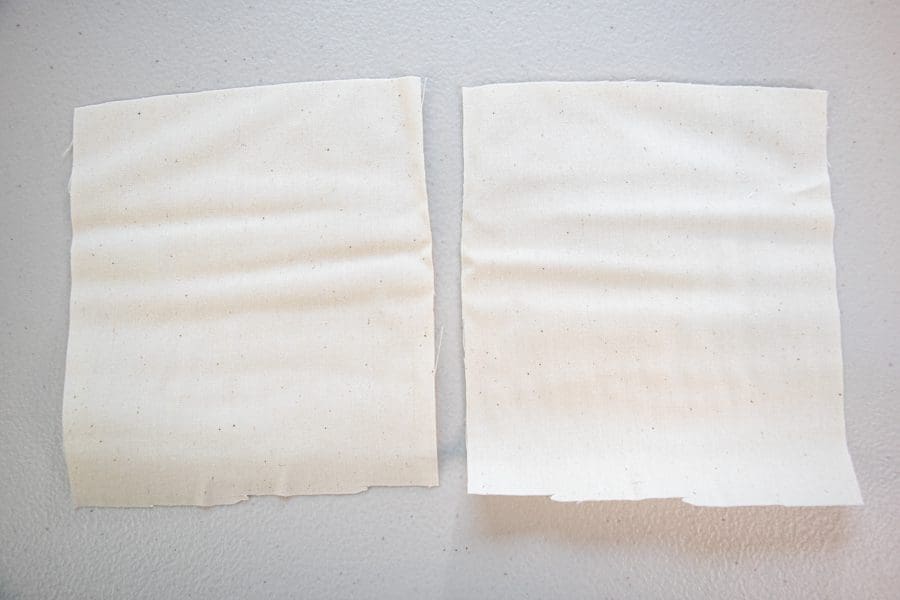
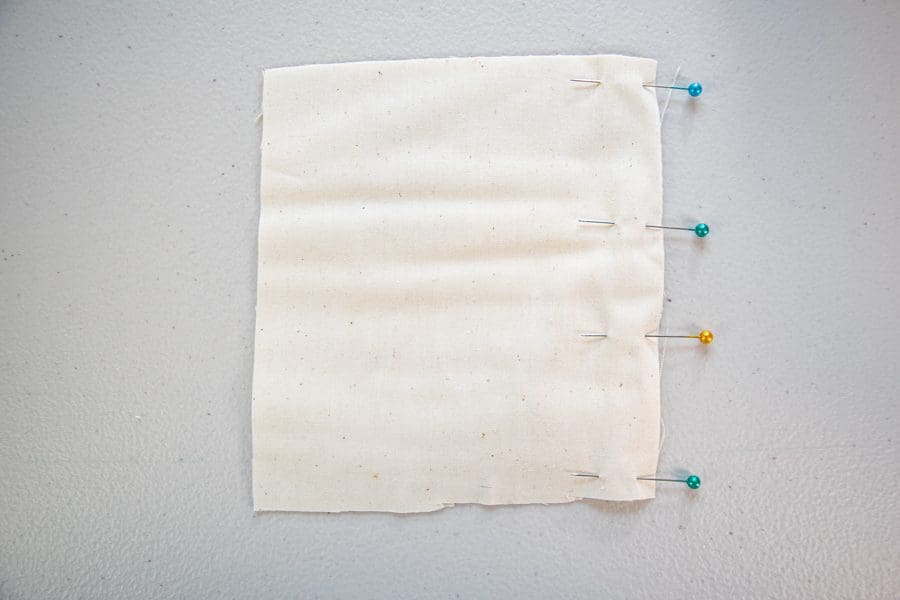
First, place the two pieces of fabric you want to sew with wrong sides together and pin the edges together. Note that this is the opposite from how you would normally start a seam, where you would pin them with right sides together.
Sew the seam with a ¼ inch seam allowance. I find it easiest to always make my first pass of stitching at ¼ inch.
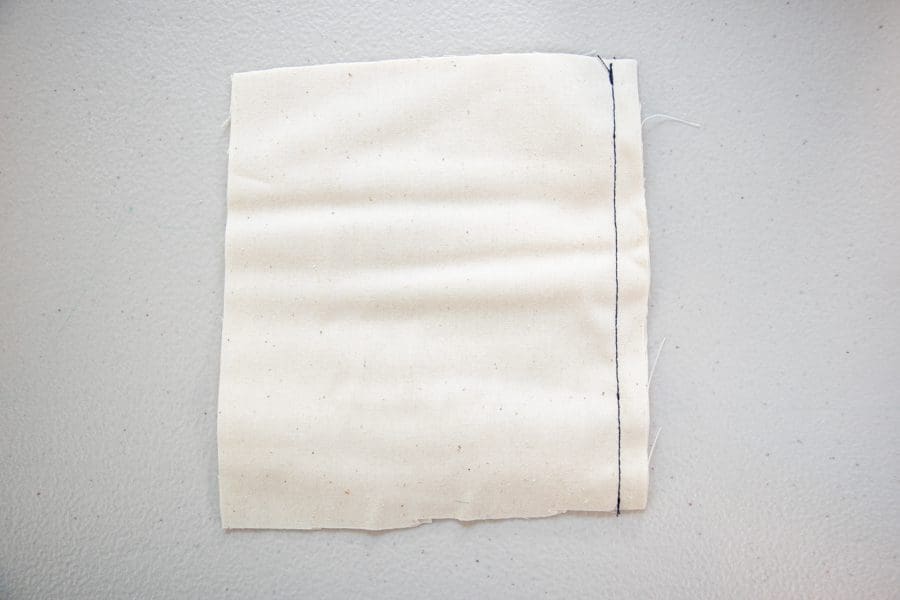
Next, trim the seam allowance down by half with your scissors, to ⅛ inch.
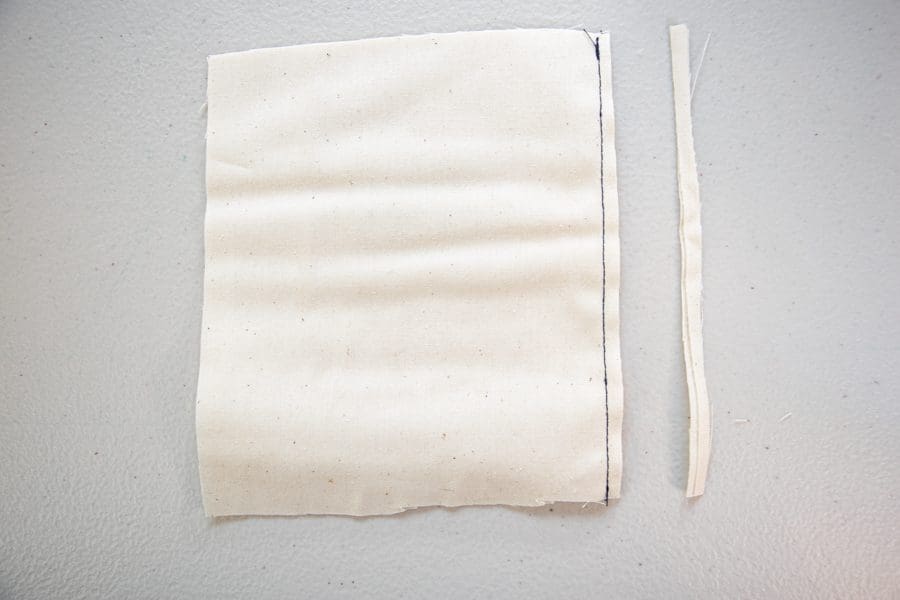
Press the seam allowances open with your iron. This will help you get a nice, crisp press in the next step.
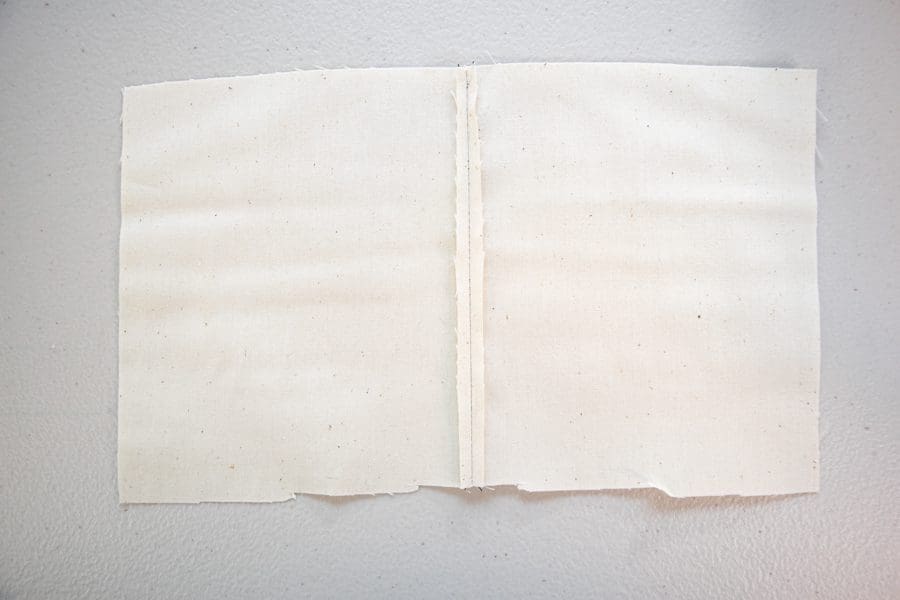
After pressing the seam allowances open, flip the fabric so that it is right sides together and the seam allowances are to the inside. Press the seam again, this time pressing your seam from the first pass of stitching to the very edge.
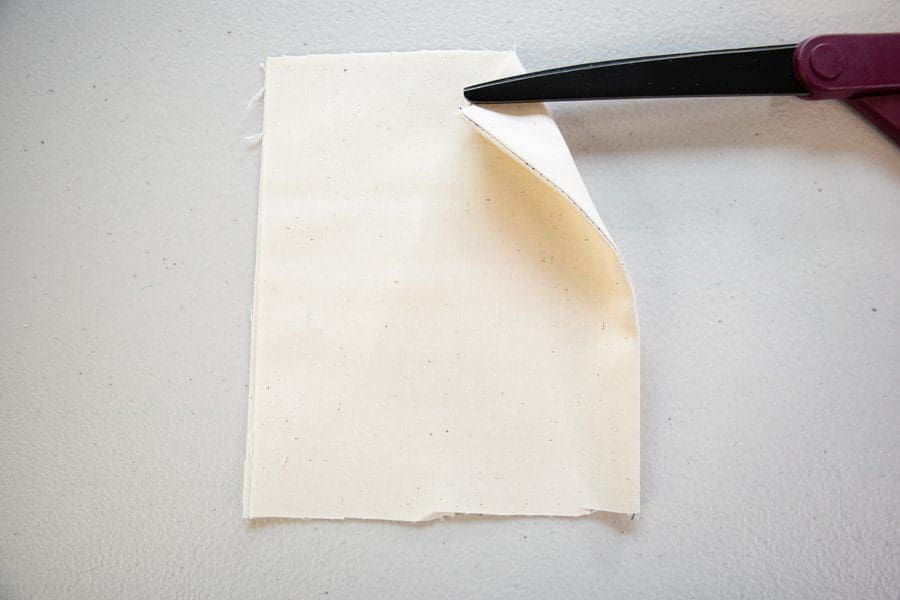
Next, stitch the seam again, this time with right sides together to encase the raw edges inside the seam. In this pass of stitching, you will want to take your remaining seam allowance (the full seam allowance minus ¼ inch).
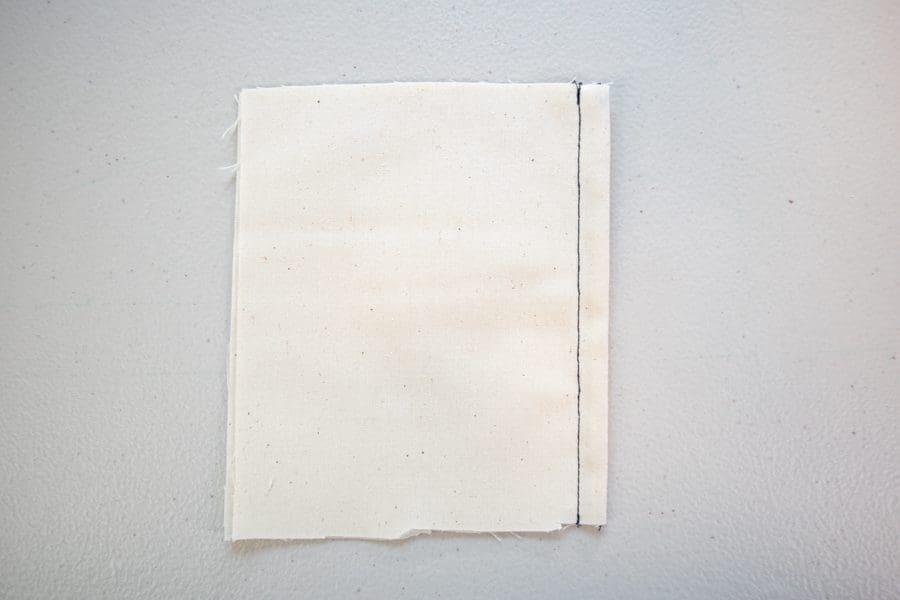
Finally, press the seam allowance to one side – you now have a beautifully sewn French seam!
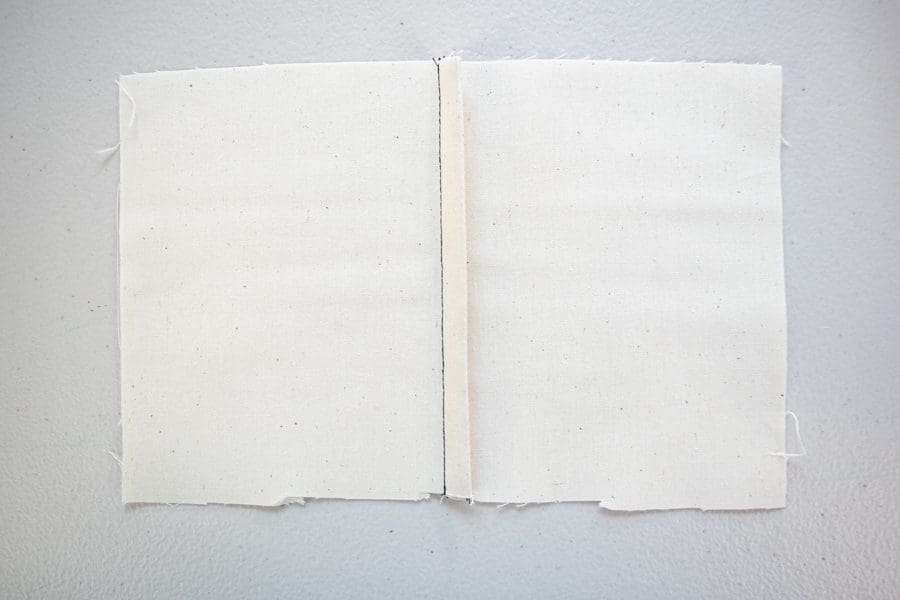
How to Use Bias Tape as a Facing
The next ‘must know’ sewing technique is using bias tape as an alternative to a traditional facing to finish a neckline, armhole, or another cut edge.
Bias tape is a great way to finish an edge – you’ll get a clean finish without dealing with bulky facings that are always trying to flip up while you’re wearing your handmade garment. You can use store-bought bias tape or make your own, but if you want better results and an easier sewing experience, I highly recommend making your own bias tape and investing in these bias tape tools. Homemade bias tape usually has more stretch and is easier to curve than purchased bias tape.
One quick note: When using bias tape as a facing, either double fold or single fold bias tape will work, but single fold will be less bulky.
How to finish a neckline with bias tape
To explain this sewing technique, I cut and sewed a tiny model of a neckline on a top – which I must say, I came to regret because working with a very tiny neckline was so much harder than a full-sized neckline.
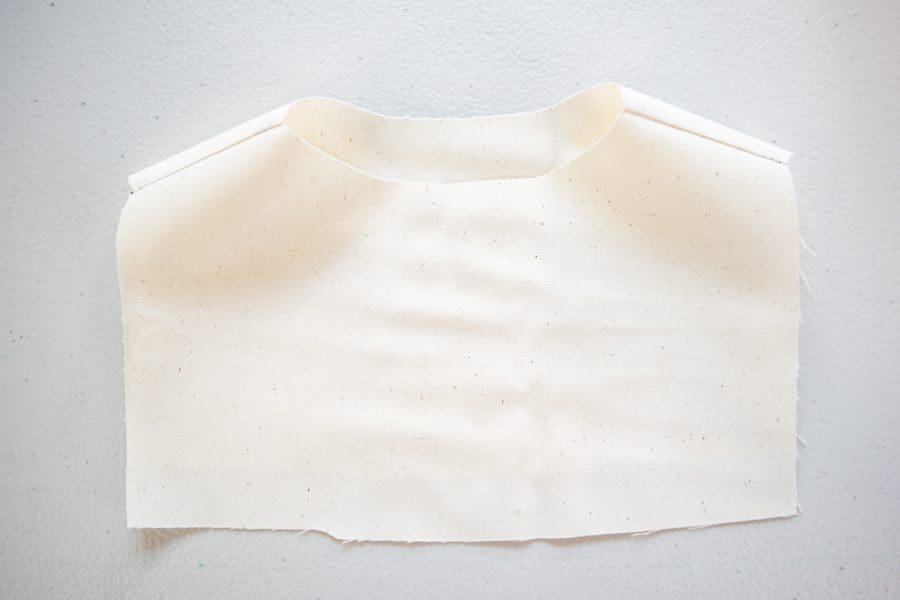
Next, grab one end of your bias tape and unfold it, pinning one raw edge to the raw edge of the neckline somewhere near the center back.
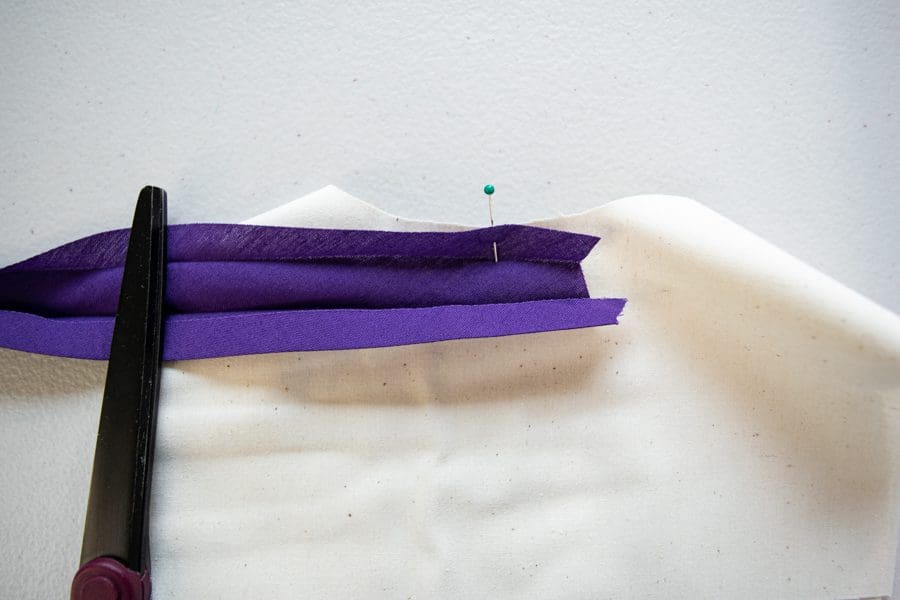
Take the neckline and bias tape to your sewing machine and start stitching in the first crease of the bias tape, starting about one inch from the end of the tape. Sewing slowly, carefully form the bias tape to the curve of the neckline as you sew it to the neckline. I find it easiest to just adjust the tape to the curve as I sew rather than pinning the entire thing to the neckline at the beginning. Stop sewing about one inch from where you started.
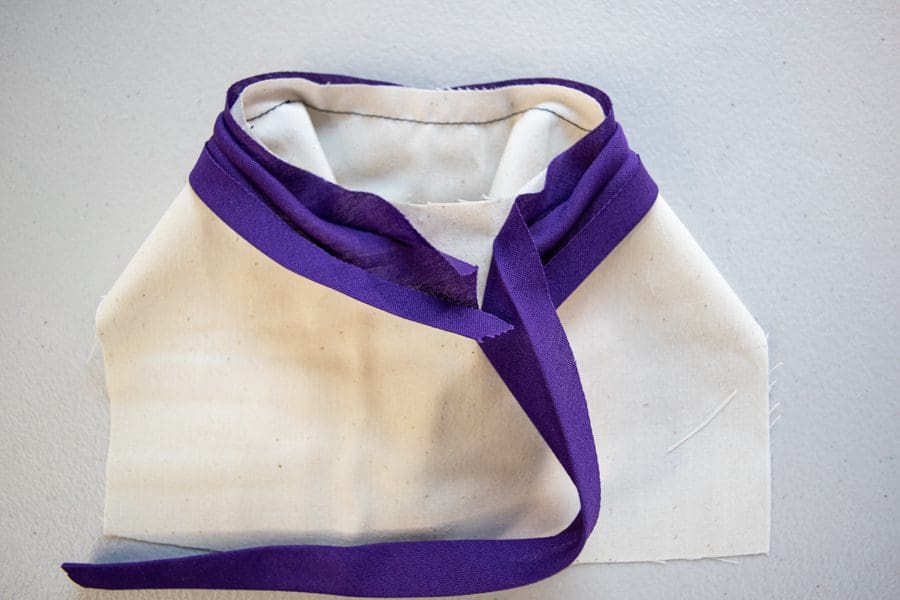
Trim away the excess tape from the longer end, leaving enough of a tail to cover the opening still left from attaching the bias tape to the neckline. Pin the two free ends of the tape together at the right spot for it to fit perfectly into the remaining unsewn space of the neckline.
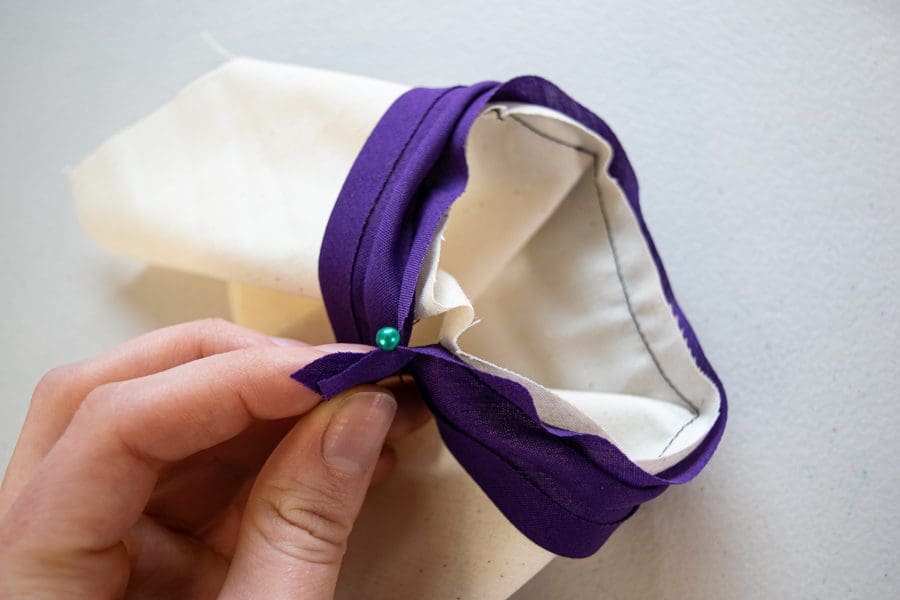
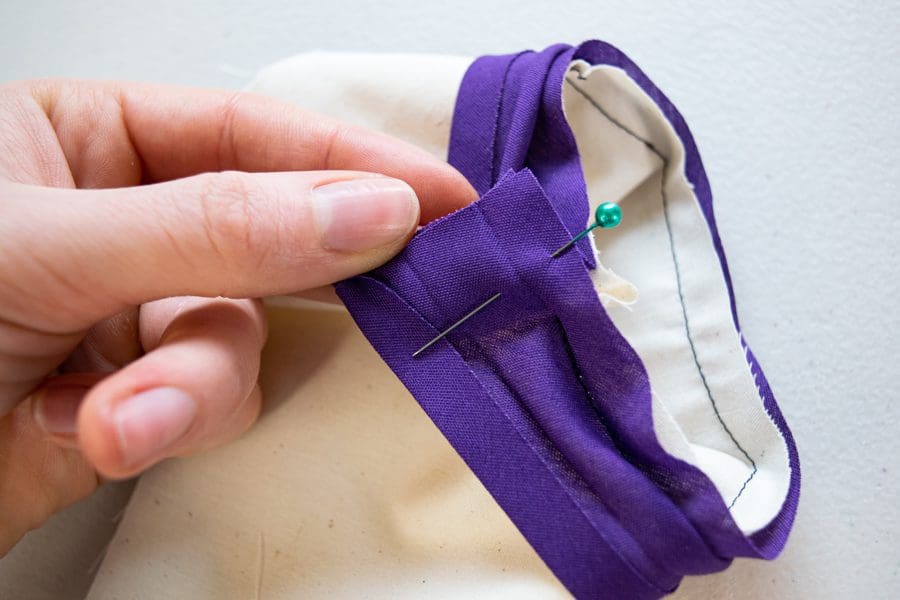
Sew the two ends of the bias tape together right at the pin, making sure to fully unfold the tape before sewing.
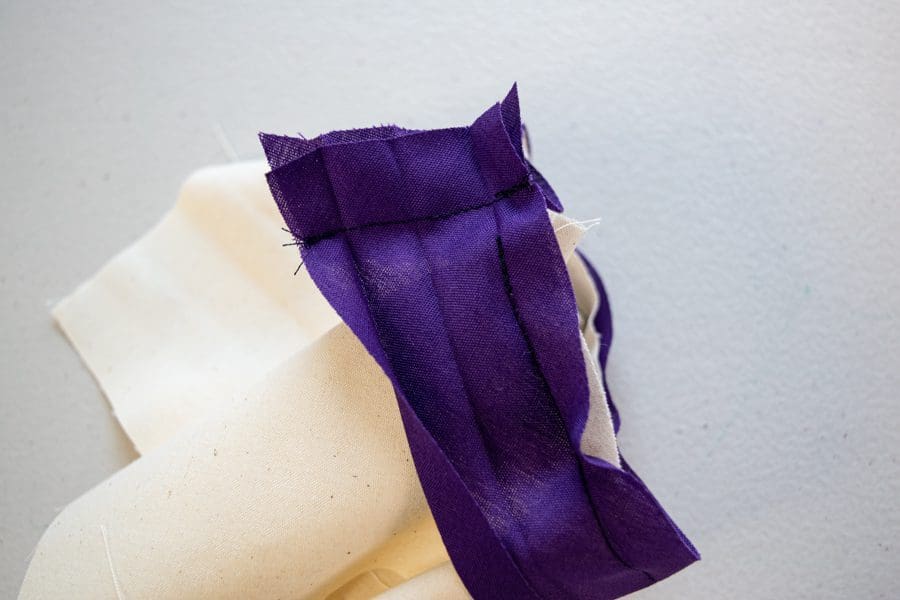
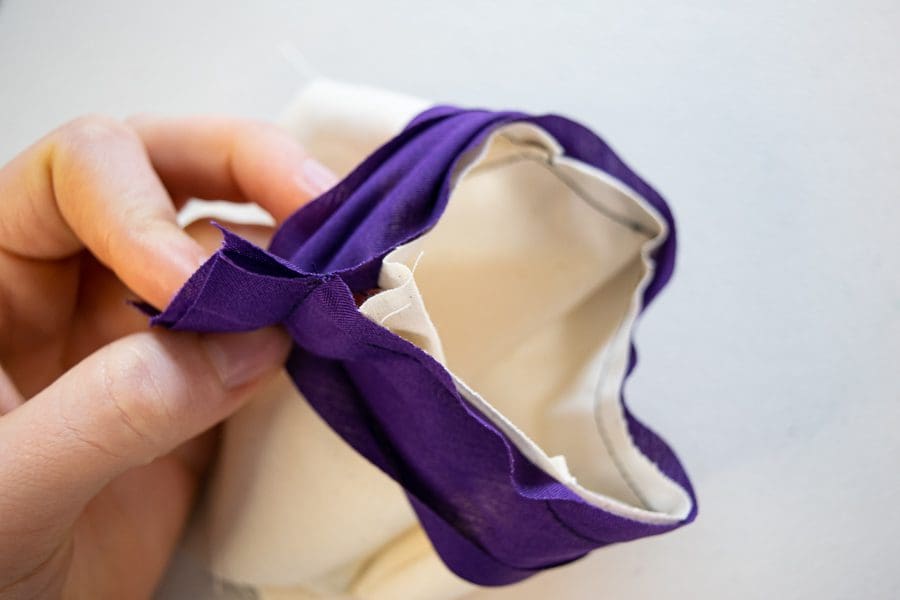
Next, trim the seam allowance of the bias tape down to about ¼ inch.
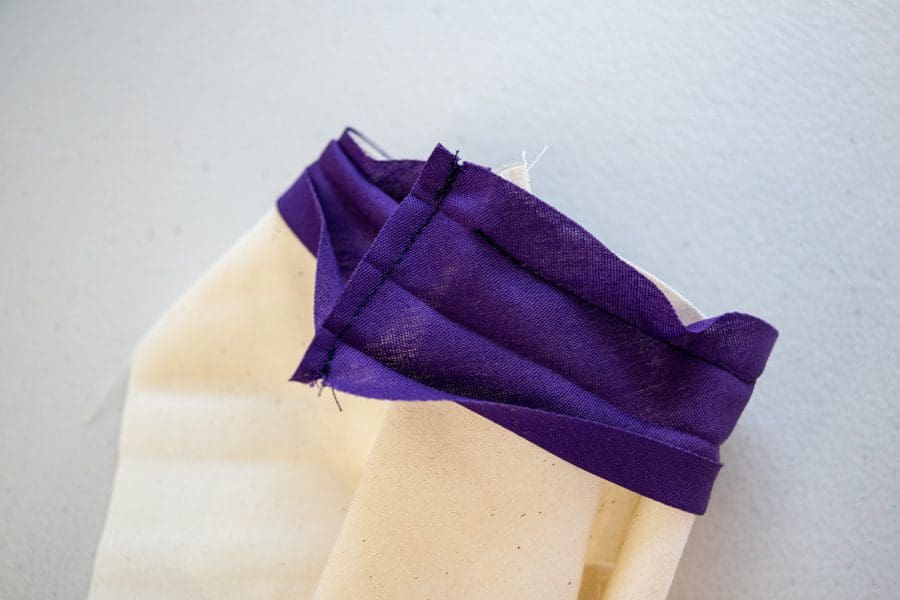
Take the neckline to your ironing board and carefully press the seam allowances open.
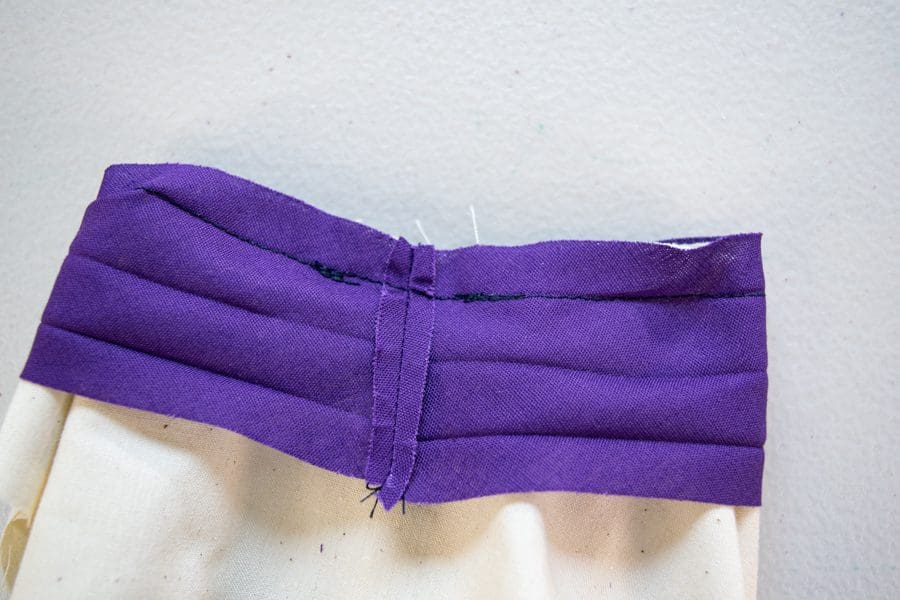
Next, trim the seam allowance at top of the neckline down to about ¼ inch and notch the neckline close to (but not through) your stitching in one-inch intervals. This will help the bias tape to lay flatter once we flip it to the inside. If you have a tight curve, you may need to add additional clippings so that the curve lays smoothly.
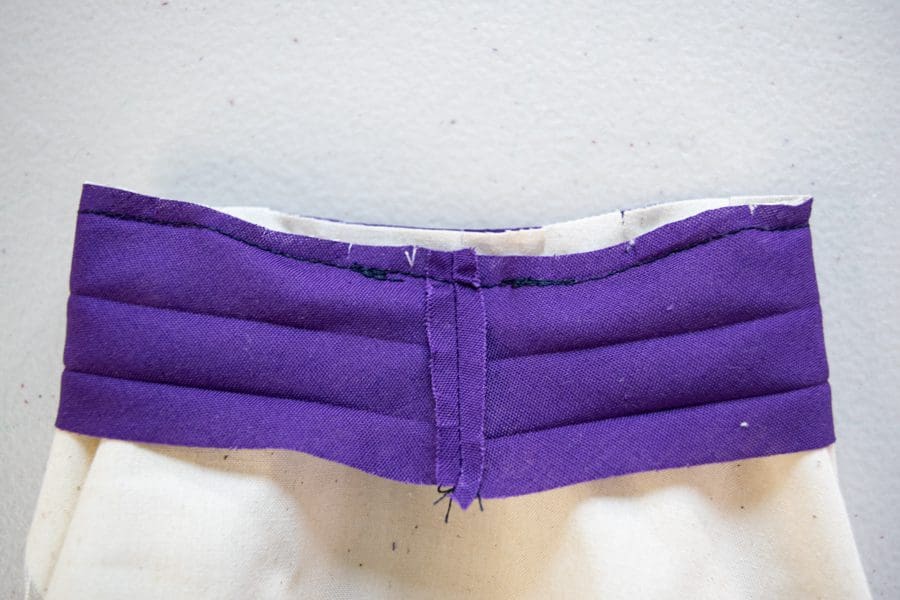
Next, refold the lower edge of the bias tape, flip it to the inside of the neckline, press it flat, and top stitch it in place. For the best results, use thread that matches the fabric of your project.
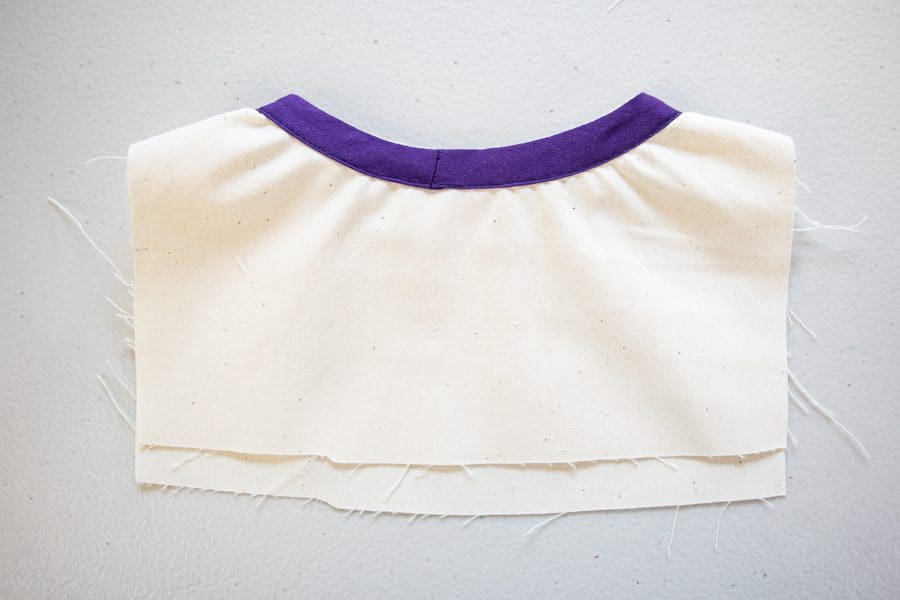
Below is how it will look from the inside. How wide your bias tape finish is will depend on the width of tape you use.
Also, this is the step where I came to regret the combination of my tiny-sized model neckline and using store-bought bias tape – it was very difficult to get that stiff bias tape to form to that little neckline, so I ended up with quite a bit of puckering.
However, with a full-sized neckline and handmade bias tape you will not have that issue! I have used this method many times before with great results. Check out this tutorial for awesome instructions on making your own bias tape.
How to Grade Between Sizes: Easy Pattern Fitting
Next, let’s talk pattern fitting. One of the best and easiest methods to improve the fit of the garments you make is by learning to grade between sizes.
What is grading between sizes?
Grading between sizes is a simple pattern alteration that you can do if you fall into different sizes at the different measurement areas on a pattern sizing chart. For example, you may fall into a size 14 at the bust and waist and a size 16 at the hip. You may even fall into different sizes in all three areas. If that is the case, it is easy to fix – let’s get into grading between sizes!
How do you grade between sizes?
First, take your measurements and determine which sizes you fall into at the bust, waist, and hip.
In my example, I will be altering a tunic front pattern piece – just remember that you will need to do this same technique on each pattern piece that will cover multiple measurement areas (bust, waist, hip). For example, you won’t need to adjust a neckline facing or a sleeve, since they won’t go below the waist, but you will need to adjust the tunic back piece to match the front.
Let’s assume that I measured into a size 10 at the bust and waist and a size 14 at the hip.
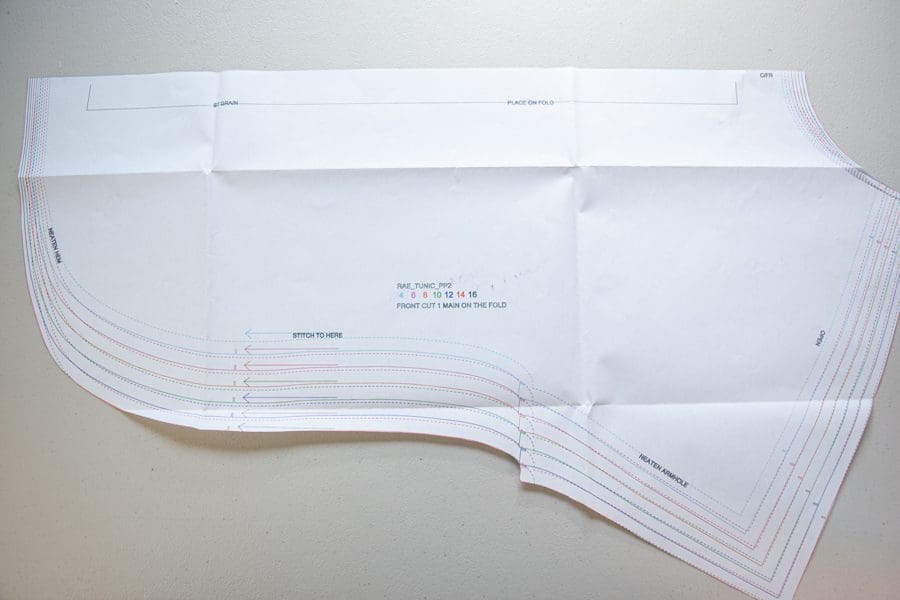
First, find the bustline and mark the size 10 (or whatever your bust size is). For this tunic top, it is a loosely fitting garment with a drop shoulder, so I’m going to mark the bust right below the underarm area. Find the hipline and mark the size 14. Unless it is a very fitted garment, you don’t need to be super meticulous about getting the bustline/ waistline/ hipline in the exact right spot – a good ballpark will work just fine.
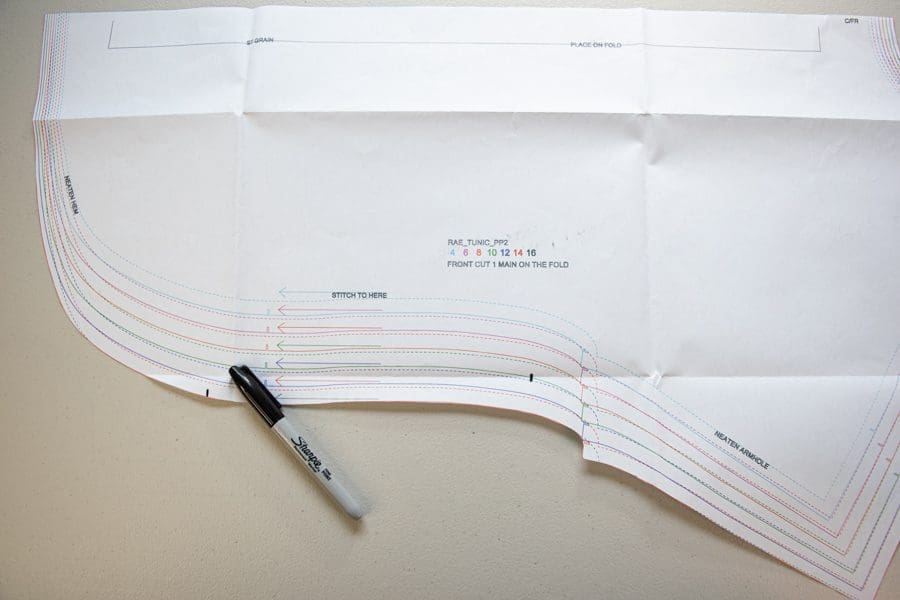
Next, use your French curve ruler (if you aren’t familiar with this tool, check out this article I wrote) to begin drawing in a curve from the hip marking up towards the bust marking. The key is to try to make your curve follow the same type of path as the curves already marked on the pattern. If you don’t own one, here’s a link to a French curve ruler.
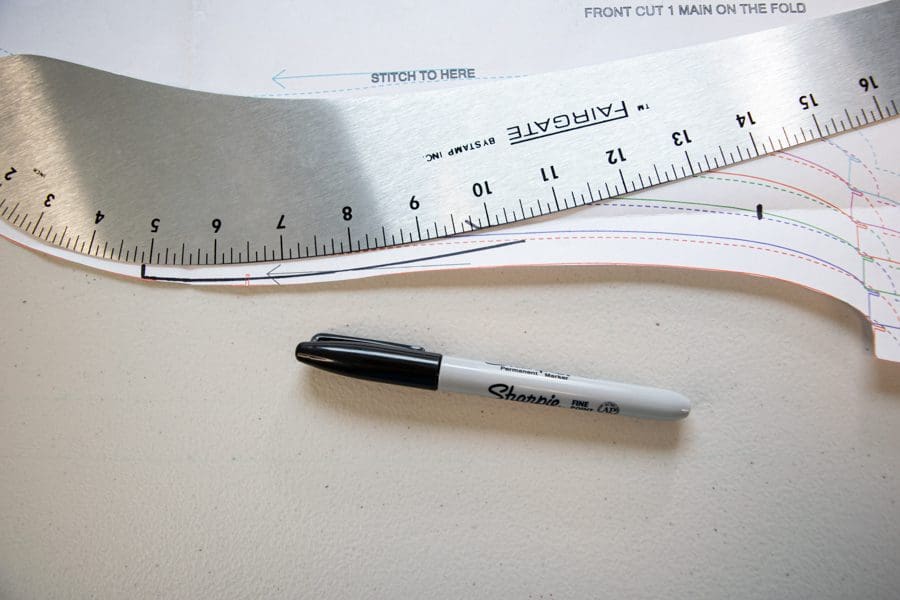
Finish drawing in your curve, connecting it to the bustline mark. For me to get a nice curve for this tunic, I needed to flip my French curve ruler around to get an inward-facing curve on the bust end of my line.
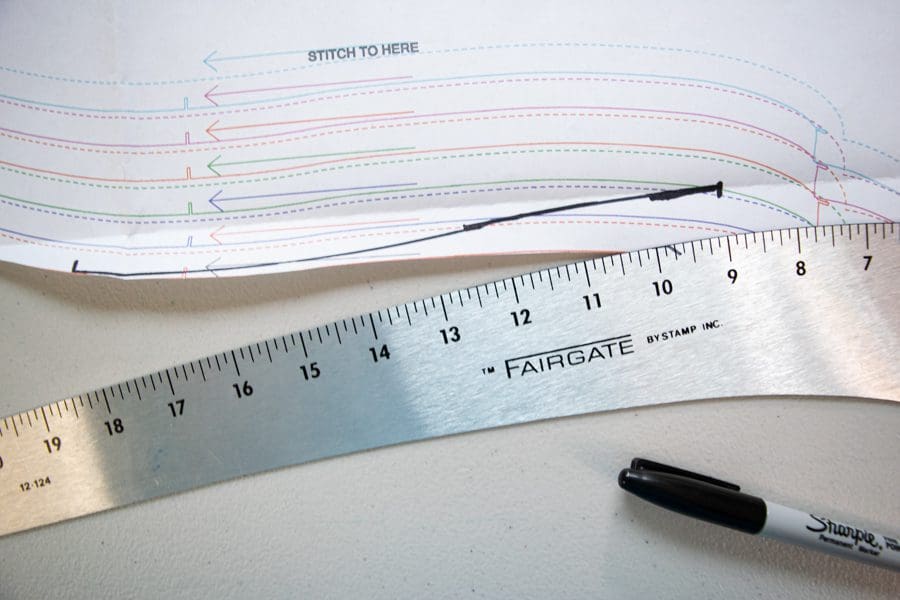
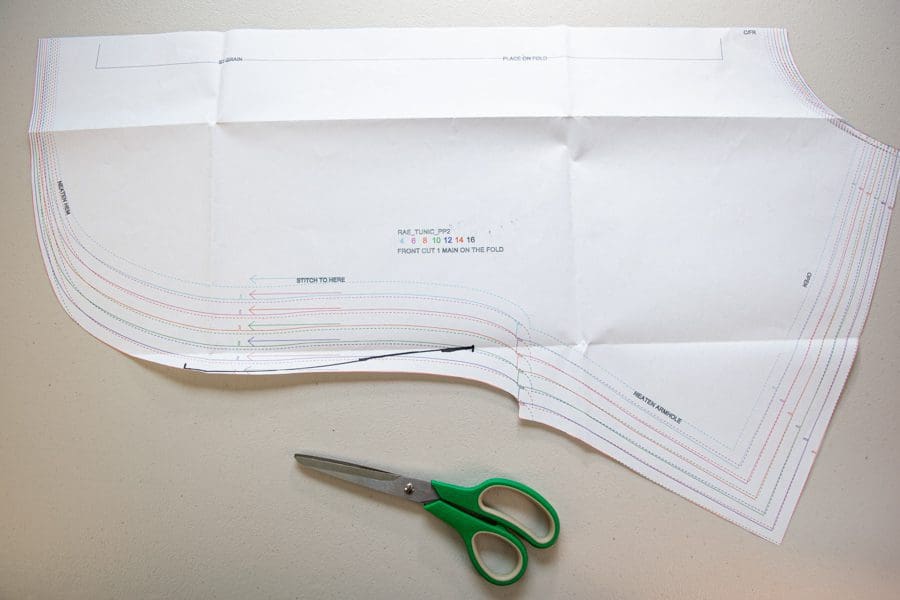
Next, cut out your pattern piece, cutting the bust size for everything above the bust marking, following your connection line between the two markings, then cutting the hip size for everything below the hip marking.
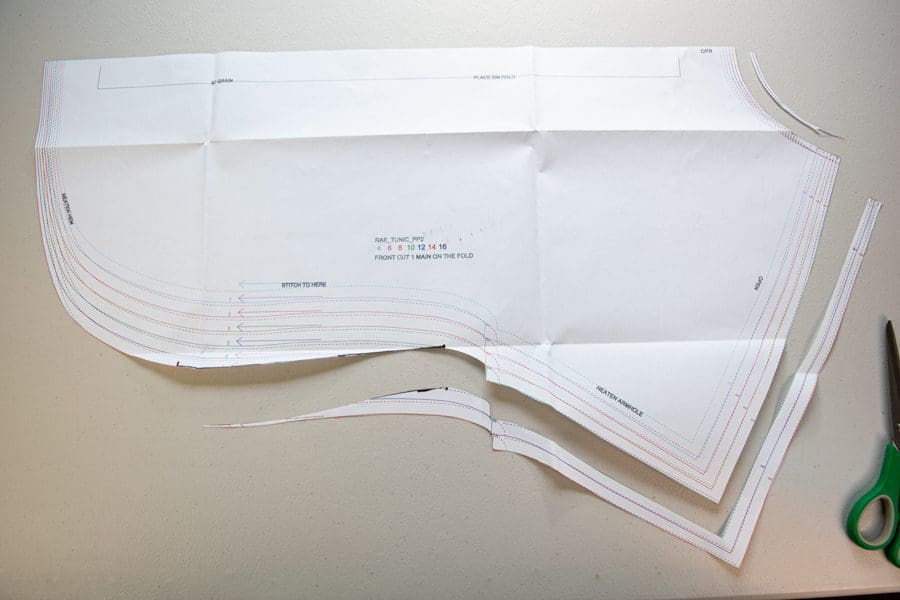
This sewing technique will work for grading between any combination of sizes – if you fall into different sizes at the bust, waist, and hip, simply include a marking for all three, then draw curves in to connect each of your three markings.
While the sewing techniques I have covered in this article may seem challenging, they aren’t if you take time to learn and practice them. Each sewing technique will improve the quality of your work and strengthen your sewing skills.
If you have any questions, comments, or and would like help with a troublesome sewing technique, please use the comments section below. We would love your feedback and look forward to hearing from you!
CHRISTINE WARREN
Sewing isn’t just my job, it’s my passion. I’ve enjoyed sewing and needle working since I was very young.


